Product Details
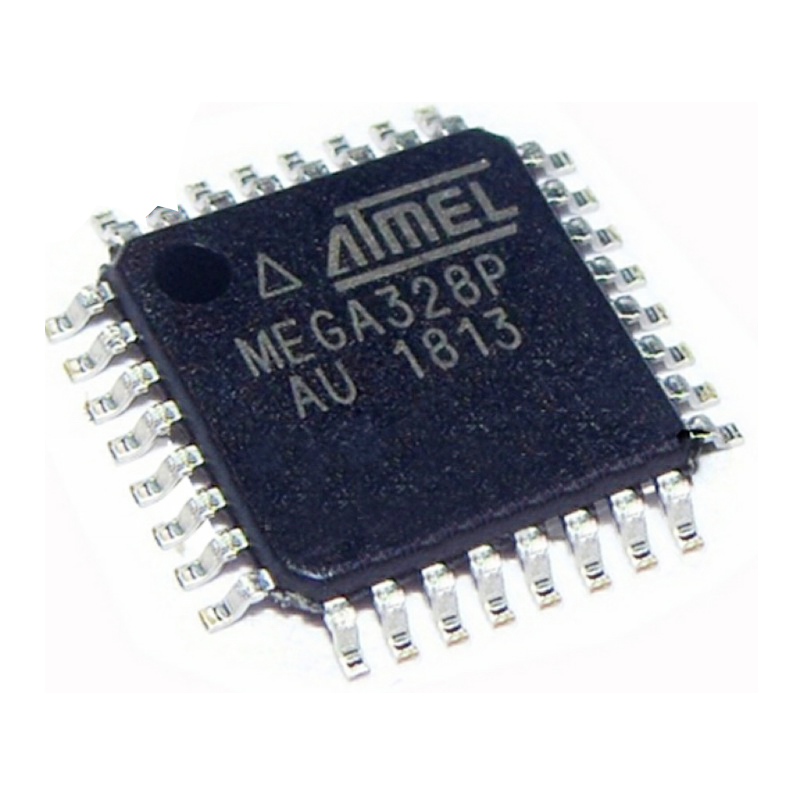
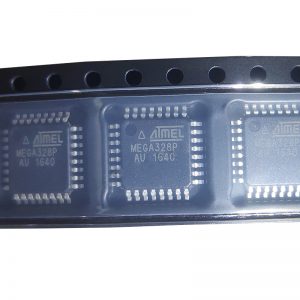
ATMEGA328P-AU Overview
In a 32-TQFP package, the MCU is available. There are 23 I/Os. There is a mounting type Surface Mount associated with this Microcontroller. This Microcontroller is based on the 8-Bit core. This Microcontroller’s program memory type is FLASH. The temperature range of this Microcontroller is within the range of -40°C~85°C TA. The AVR® ATmega series is comprised of this electrical component. The electronic part has a program memory size of 32KB 16K x 16. With a AVR Core processor, MCU is equipped with the latest technology available. The IC chip fits into the MICROCONTROLLER, RISC uPs/uCs/Peripheral ICs category. IC Chip terminations are 32. 8-bits are the size of the data that comes with MCU. There is a 5V volt supply output on the chip. The system has NO channels for DMA communication. The part owns 32kB memory size. The base part number ATMEGA328P MCU can be used to find alternatives. An effective performance can be achieved at a frequency of 20MHz. It is possible to access the 32 pins on the chip through the 32 pins. It comes with 3 timers/counters that can be set up. In total, there are 8 channels for the ADC on this board. There are a total of 1 A/D converters on the device. A total of 6 PWM channels are being used by the device.
ATMEGA328P-AU Features
AVR® ATmega series
Base part number of ATMEGA328P
32 Terminals
Based on the 8-Bit
Comes with 32 Pins
ATMEGA328P-AU Specifications
| Attribute |
Value |
| Family Name |
ATmega |
| Package Type |
TQFP |
| Mounting Type |
Surface Mount |
| Pin Count |
32 |
| Device Core |
AVR |
| Data Bus Width |
8bit |
| Program Memory Size |
32 kB |
| Maximum Frequency |
20MHz |
| RAM Size |
2 kB |
| USB Channels |
0 |
| Number of PWM Units |
1 |
| Typical Operating Supply Voltage |
1.8 → 5.5 V |
| Minimum Operating Temperature |
-40 °C |
| Dimensions |
7.1 x 7.1 x 1.05mm |
| Pulse Width Modulation |
1 (6 Channel) |
| Instruction Set Architecture |
RISC |
| Number of ADC Units |
1 |
| Program Memory Type |
Flash |
| Maximum Operating Temperature |
+85 °C |
| Length |
7.1mm |
| Height |
1.05mm |
| ADCs |
8 x 10 bit |
| Width |
7.1mm |
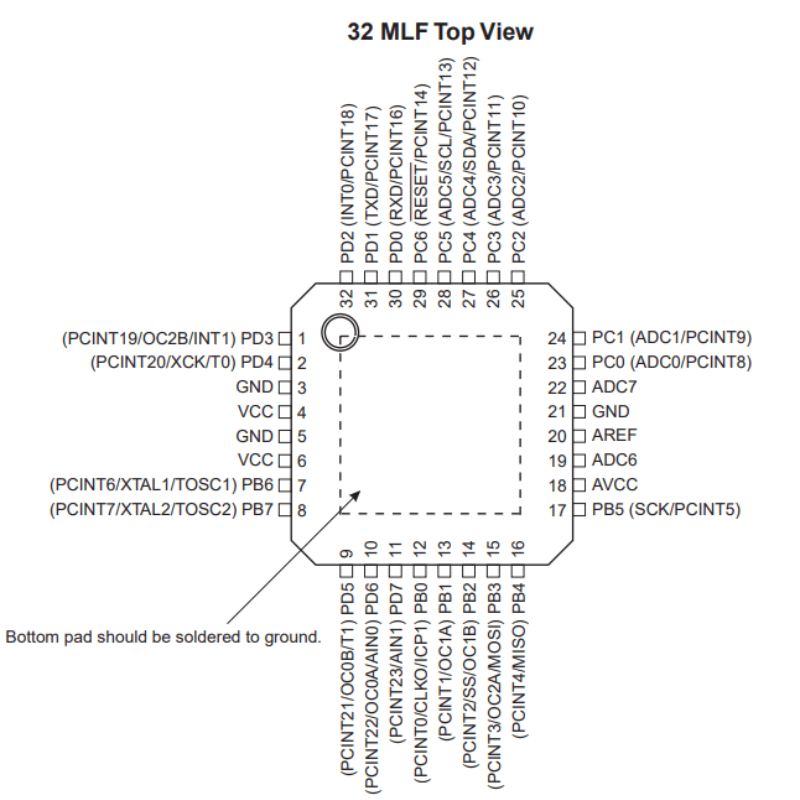
Q: Where can I find ATMEGA328P pinout details?
For those of you who are using an ATmega328 with the Arduino Bootloader code on your own circuit board here is the pinout details which shows the chip pin numbers and the associated Arduino pins.
Q: How do you connect an ATMEGA328P to an Arduino?
This tutorial explains how to migrate from an Arduino board to a standalone microcontroller on a breadboard. It’s similar to this tutorial, but uses an Arduino board to program the ATmega on the breadboard.Unless you choose to use the minimal configuration described at the end of this tutorial, you’ll need four components (besides the Arduino, ATmega328, and breadboard)
Q: Where can I find an ATMEGA328P Arduino pinout?
Note that this chart is for the DIP-package chip. The Arduino Mini is based upon a smaller physical IC package that includes two extra ADC pins, which are not available in the DIP-package Arduino implementations.
Q: How do I use an ATMEGA328P programmer?
The schematic diagrams for the programming circuits are shown below. Note that resistor R2 and LED1 are not strictly required for programming but are included in the circuit for testing purposes as defined later in this project.
Q: How do I program an ATMEGA328P?
Programming a bare ATmega328 though has provided some challenges I’m here to describe for those who might encounter the same issues.
Q: How do I install an Arduino ATMEGA328P Bootloader?
The bootloader is basically a .hex file that runs when you turn on the board. It is very similar to the BIOS that runs on your PC. It does two things. First, it looks around to see if the computer is trying to program it. If it is, it grabs the program from the computer and uploads it into the ICs memory (in a specific location so as not to overwrite the bootloader).
Q: Where can I find an ATMEGA328 pinout?
ATmega328 is an eight (8) bit micro-controller. It can handle the data sized of up to eight (8) bits. It is an AVR based micro-controller. Its builtin internal memory is around 32KB. It operates ranging from 3.3V to 5V. It has an ability to store the data even when the electrical supply is removed from its biasing terminals. Its excellent features include the cost efficiency, low power dissipation, programming lock for security purposes, real timer counter with separate oscillator. ATmega-328 is shown in the figure given below.
Q: Where can I find a pinout for Arduino with an ATMEGA328?
Figure 3. Schematic of Arduino UNO input/output pins and Atmega328 pins correspondence. Arduino development platform detailed features: -14 digital input/output pins where -6 of the 14 can be used as PWM outputs -6 analog inputs -16 MHz clock speed -usb connection for programming and interfacing -DC power jack 7-12V input -5V DC operating voltage -3.3V DC pin -32KB flash memory -Atmega328 based microcontroller -Arduino IDE programming interface -10bit ADC
Q: What are the pin names mapping from Arduino to the actual ATMEGA328P pin mapping?
What is the pin names mapping from Arduino to the actual AVR pin mapping? I need to use the board for pure AVR programming. The Arduino board uses an ATmega328P-PU chip.
Q: Where can I download the ATMEGA328 microcontroller pinout?
The Atmega328 is one of the microcontroller chips that are used with the popular Arduino Duemilanove boards. The Arduino Duemilanove board comes with either 1 of 2 microcontroller chips, the Atmega168 or the Atmega328. Of these 2, the Atmega328 is the upgraded, more advanced chip. Unlike the Atmega168 which has 16K of flash program memory and 512 bytes of internal SRAM, the Atmega328 has 32K of flash program memory and 2K of Internal SRAM.
Q: Does Arduino Uno use the ATMEGA328 microcontroller?
Arduino Uno is a microcontroller board based on the ATmega328P (datasheet). It has 14 digital input/output pins (of which 6 can be used as PWM outputs), 6 analog inputs, a 16 MHz quartz crystal, a USB connection, a power jack, an ICSP header and a reset button.
Q: How do I program the ATMEGA328 with Arduino bootloader?
Building on various blog entries for a basic Arduino or Arduino on a breadboard I’ve found the ATMega328 chip really easy to use and program. This allows me to build circuits running Arduino for around £2 – cost of an ATMega328 chip & bypass capacitor. It does require investment in an Arduino UNO or similar (£10) to act as a programmer.
Q: How do I burn an ATMEGA328 bootloader?
So you just finished soldering up your Sanguinololu, Gen7 or whatever board and are ready to test it to see if everything is working properly, but before you can upload any firm ware to the board you need to burn a Bootloader to the ATmega 644P. In this tutorial I will cover using an Arduino or Arduino clone as your ISP programmer. NOTE: Instead of breadboarding, you could use the 6-pin ISP connector found on most RepRap electronics. No tutorial or pictures so far. –Traumflug 10:20, 23 April 2013 (UTC)
Q: How do I program ATMEGA328 with a bootloader and Arduino Uno?
Burning the boot loader in an atmega328 could be somewhat tricky but if u follow these steps correctly youll be able to bootload any type of atmega328 micro controller. To upload the code just open the Arduino IDLE which is the place where u type codes. click on files/examples/Arduino ISP and another screen pops up make sure u have the correct board selected (not the atmega microcontroller on the breadboard).
Q: How do I use Arduino as an ISP to write an ATMEGA328 bootloader?
Well if you see the microcontroller on your Arduino UNO you will find out that it is using the picopower micro, not the normal one. I bought 3 normal ones. OMG then I’m totally screw. Well no, you just have to make a pair of changes on your Arduino files to make it work.
Q: How do I get started with ATMEGA328 programming?
The advantage of the Arduino architecture is that you can set up the development environment in no time. It probably takes you less than 10 minutes until the microcontroller (MC) finally blinks your first LED. This ease of use has made Arduino so popular among hobbyists. At some point, however, you wish to go beyond Arduino, produce standalone prototypes that may not require the USB connection nor the boot loader. You may also wish to tinker with the fuses that configure the MC at the hardware level and use clocks other than Arduino’s 16 MHz.
Q: How do I make a simple ATMEGA328 programmer?
There are lots of tutorials around for building an Arduino on a breadboard, using an Atmega328 (or the older 168) chip, a crystal, a few capacitors and resistors and a power supply. It’s a fun project that every Arduino hacker should try at least once. But while there are lots of instructions on how to wire up a breadboard Arduino, most instructions on how to program one are confusing and incomplete. Of course, you can program your Atmega chip while it’s in an Arduino, then unplug it from the Arduino’s socket and move it to the breadboard. But what a hassle! It’s so more convenient to leave the chip in the breadboard while you test new versions of the code. And you can, in two different ways: with FTDI, which uses the Arduino bootloader, or with an ISP, which doesn’t.
Q: How do I burn a bootloader to the ATMEGA328 SMD version?
Here I will show you how to burn a bootloader to a ATmega328p AU SMD chip using an Arduino NANO as ISP programmer.
Q: Where can I compare the ATMEGA168 with the ATMEGA328?
The ATmega328 (and the ATmega168 before that, and ATmega8 before that,…) is a staple of the Arduino platform. 32kB of flash (program space), up to 23 I/Os – eight of which can be analog inputs – operating frequencies of up to 20 MHz. None of it’s specifications are flashy, but this is still a solid 8-bit microcontroller. For many electronics projects, what the 328 provides is still more than enough.