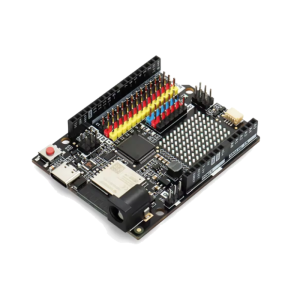
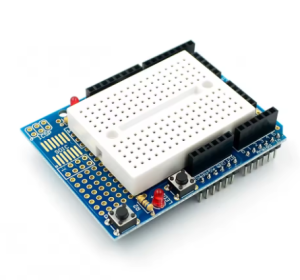
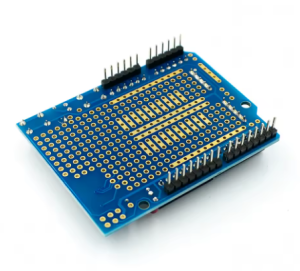
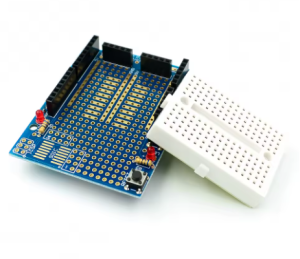
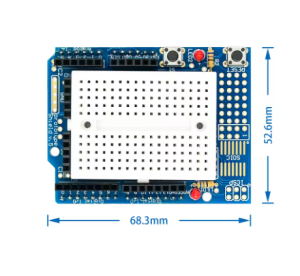
ProtoShield Expansion Board with 170 Points Mini Breadboard with LED

SKU: FA1030-00
Compatibility

Arduino UNO R3 and compatible boards

Prototyping Grid

Standard 0.1″ (2.54mm) pitch

Breadboard Tie Points

170 points (2 × 17 rows)

Breadboard Dimensions

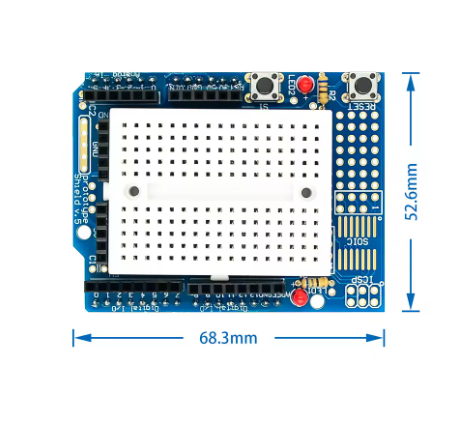
45 × 35 × 9 mm

SOIC IC Support

Up to 14 pins

DIP IC Support

Up to 20 pins

LED Indicators

2 on-board LEDs

Breadboard Adhesive

Self-adhesive backing

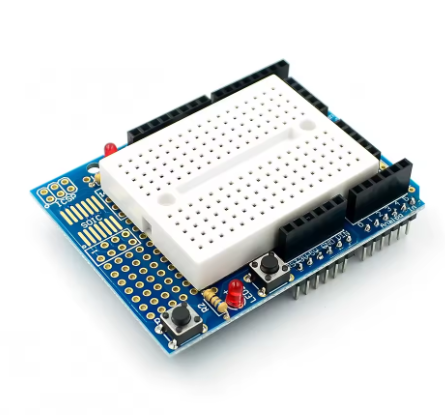
The ProtoShield Expansion Board is a versatile prototyping add-on designed for Arduino UNO R3 and compatible development boards. It provides a dedicated space for building custom circuits directly on top of your Arduino, bridging the gap between temporary breadboard experiments and permanent soldered projects.

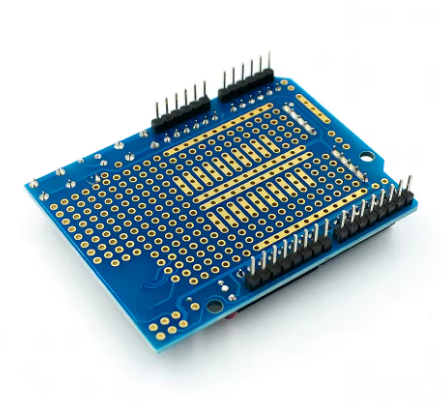
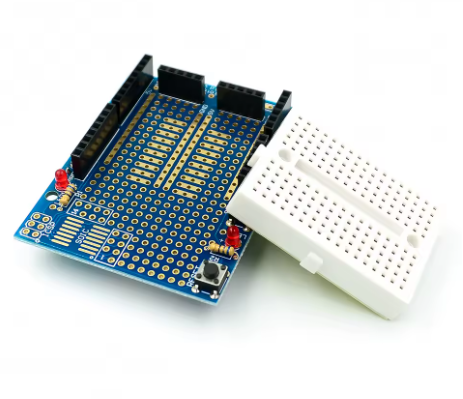
The shield features a standard 0.1-inch prototyping grid with plated through-holes, allowing you to solder components permanently for a secure, reliable connection . For users who prefer solderless prototyping, the included 170-point mini breadboard attaches directly to the shield’s surface with its self-adhesive backing, enabling quick circuit changes without any soldering . This dual approach means you can start with a breadboard prototype and transition to a soldered build when your design is ready.

Two on-board LED indicators provide visual feedback for power status or custom signals, making it easy to monitor your circuit’s state at a glance . The shield also breaks out all Arduino control and power pins, including 5V, 3.3V, and VIN rails, ensuring you have full access to your board’s capabilities .

A dedicated surface-mount IC area supports up to 14-pin SOIC chips, and the prototyping area accommodates DIP ICs up to 20 pins, giving you flexibility to integrate a wide range of integrated circuits . The shield is fully stackable, and the ICSP header is accessible for advanced programming or bootloader recovery without removing the shield .

Whether you are a student learning electronics, a hobbyist building a permanent project, or a business deploying custom hardware, this ProtoShield provides a practical, organized platform for turning your circuit ideas into working hardware.


Features

  • Dual prototyping modes – Solder components directly to the plated through-holes, or use the included 170-point mini breadboard for solderless experimentation.

  • 170-point mini breadboard included – Self-adhesive backing allows it to attach securely to the shield’s prototyping area .

  • Two on-board LED indicators – For power status or custom signal monitoring .

  • Full pin breakout – All Arduino digital, analog, and power pins are extended for easy access .

  • SOIC SMD support – Dedicated surface-mount area for up to 14-pin SOIC chips .

  • DIP IC accommodation – Prototyping grid fits DIP ICs up to 20 pins .

  • Stackable design – Compatible with other shields; ICSP header remains accessible .

  • Reset button included – Convenient for restarting programs without removing the shield .


Technical Specifications

# Parameter Specification
1 Compatibility Arduino UNO R3 and compatible boards
2 Prototyping Grid Standard 0.1″ (2.54mm) pitch
3 Breadboard Tie Points 170 points (2 × 17 rows) 
4 Breadboard Dimensions 45 × 35 × 9 mm 
5 SOIC IC Support Up to 14 pins 
6 DIP IC Support Up to 20 pins 
7 LED Indicators 2 on-board LEDs 
8 Breadboard Adhesive Self-adhesive backing

Usage

Getting Started

  1. Attach the mini breadboard – Peel the adhesive backing from the 170-point breadboard and press it onto the shield’s designated prototyping area .

  2. Stack the shield – Align the shield’s headers with your Arduino UNO R3’s pin sockets and press firmly to seat it .

  3. Build your circuit – Insert components and jumper wires into the mini breadboard for solderless prototyping, or solder directly to the through-holes for permanent connections .

  4. Connect power – Use the broken-out 5V, 3.3V, and GND rails to power your circuit .

  5. Monitor with LEDs – Use the on-board LEDs as visual indicators for power or signal status .

Typical Applications

  • Learning electronics and circuit prototyping

  • STEM and classroom experiments

  • Building permanent shield-based projects

  • Testing sensor and control circuits

  • Integrating SMD ICs into Arduino projects

  • Custom hardware development and OEM integration

  • Corporate training and workshop demonstrations

Notes for Business Buyers

  • The included breadboard allows for rapid iteration without soldering, reducing setup time for training sessions.

  • Solderable through-holes support permanent builds for deployed products.

  • Standard UNO form factor ensures compatibility with existing Arduino hardware in classrooms and labs.

  • Suitable for bulk purchasing for educational institutions and training programs.

Q: Is this ProtoShield compatible with Arduino UNO R3?

Yes. It is specifically designed for the Arduino UNO R3 footprint and is also compatible with similar boards that use the standard UNO header layout.

Q: Do I need to solder anything to use this shield?

No. The included 170-point mini breadboard allows for fully solderless prototyping. You can also choose to solder components directly to the shield if you want a permanent connection.

Q: What is the purpose of the on-board LEDs?

The two LEDs can be used as power indicators or for custom signal monitoring in your projects.

Q: How does the mini breadboard attach to the shield?

The breadboard has a self-adhesive backing. Simply peel off the protective film and press it onto the shield’s prototyping area .

Q: Can I use this shield with other shields stacked on top?

Yes. The shield is designed to be stackable. The ICSP header is also accessible, so you can use an AVR programmer or stack additional shields without removing it.

Q: What types of ICs can I use with this shield?

The prototyping area accommodates DIP ICs up to 20 pins, and there is a dedicated surface-mount area for SOIC chips up to 14 pins .

Q: Does this shield come assembled or as a kit?

The shield comes pre-assembled with headers and LEDs already mounted, ready to use. The mini breadboard is included and attaches separately.

Q: Can I power my circuit from the shield?

Yes. The shield breaks out the Arduino’s 5V, 3.3V, and VIN power rails, along with multiple GND connections .

Q: Is this suitable for beginners?

Yes. The solderless breadboard option makes it ideal for beginners learning circuit design without the need for soldering equipment.

Q: Can I order in bulk for a school or training program?

Yes. This shield is suitable for both individual users and business purchasing, including classroom sets, lab equipment, and corporate training programs.