ProtoShield Expansion Board with Mini Breadboard – Plug-and-Play Prototyping Shield for Arduino UNO R3

SKU: FA1030
Compatibility

Arduino UNO R3, Duemilanove, others with UNO footprint

Shield Dimensions

~70mm x 54mm

Prototyping Area Grid

Standard 0.1" (2.54mm) spacing

Mini Breadboard Tie-Points

170 points (approx. 48mm x 34mm size)

Onboard LEDs

2 x 3mm LEDs (Red/Green) with resistors

Onboard Buttons

1 x General-purpose pushbutton, 1 x Reset button

SMD Support

Area for up to 14 or 24-pin SOIC IC

Power Rails

Dedicated 5V, 3.3V, Vin, and GND rails available

Connectivity

All I/O pins broken out to headers; Pass-thru ICSP header

Product Description
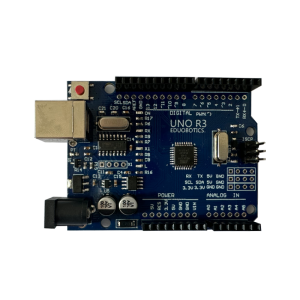
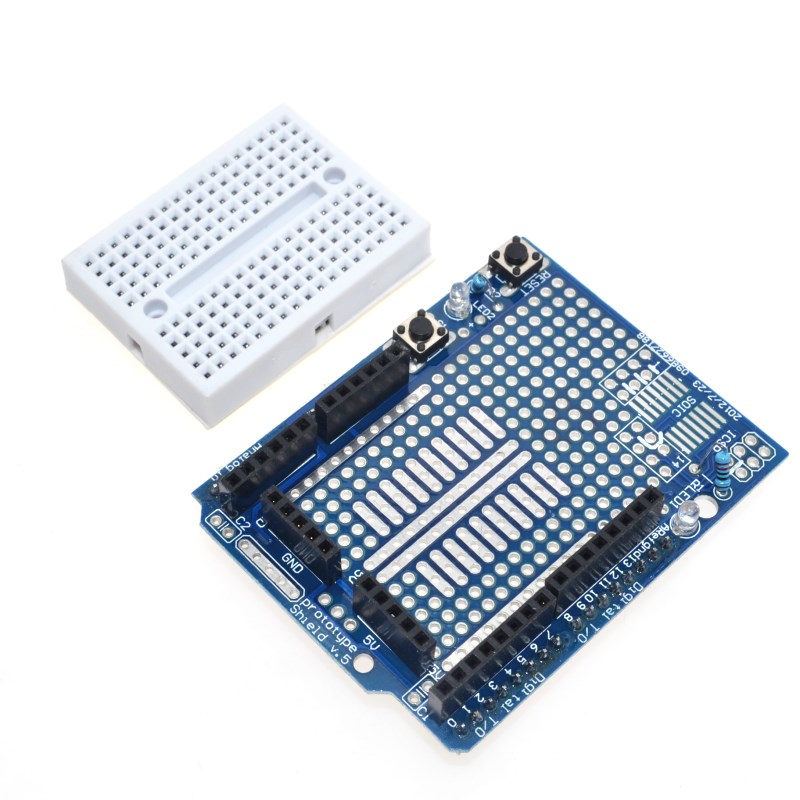
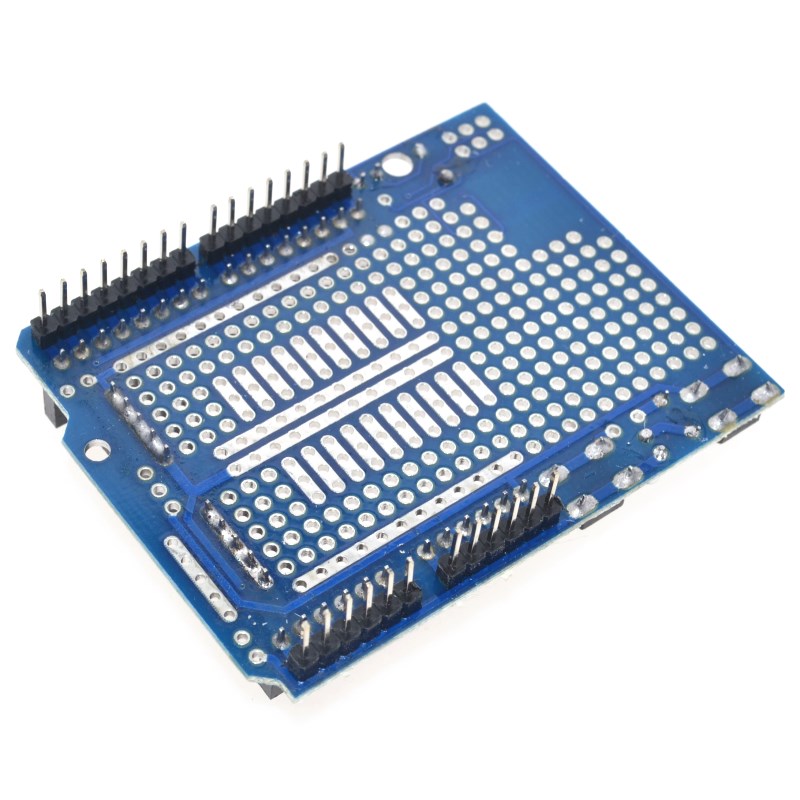
The ProtoShield Expansion Board with Mini Breadboard transforms your Arduino UNO R3 into a flexible, integrated prototyping platform. This shield is designed to stack directly onto your Arduino board, providing a large, dedicated area where you can build custom circuits without permanently altering the main Arduino board.
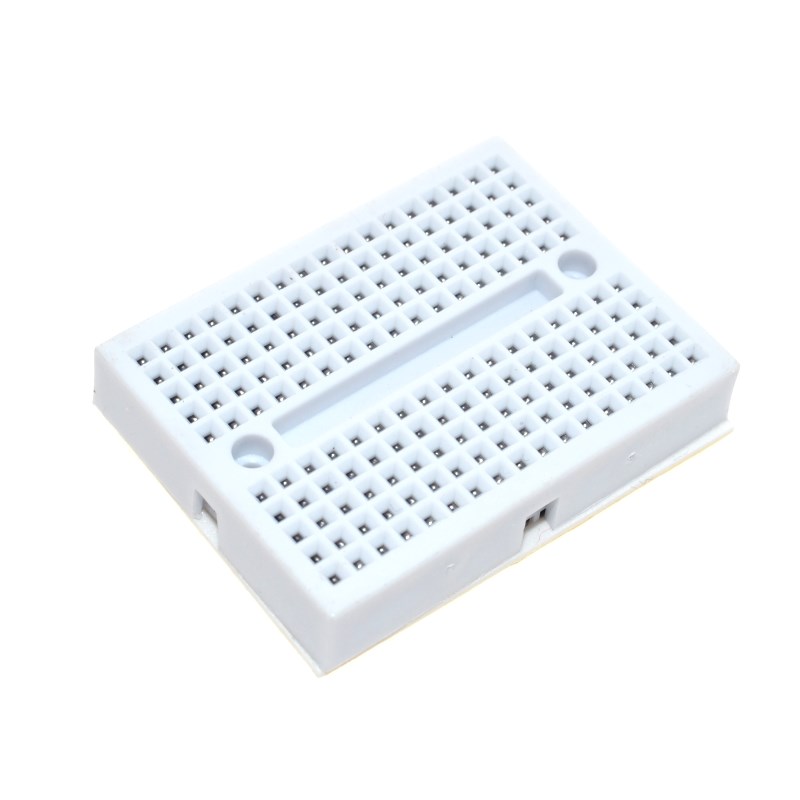
This product caters to both quick, temporary experimentation using the included 170-tie-point mini breadboard and permanent project creation through its versatile solderable prototyping grid. The mini breadboard features an adhesive backing, allowing you to secure it firmly to the shield, keeping your project contained in a single, compact module.
For users transitioning from breadboard circuits to a more durable, final product, the ProtoShield includes a prototyping area with standard 0.1″ (2.54mm) spacing, allowing you to solder components, through-hole (DIP) ICs, or even surface-mount (SOIC up to 14/24 pin) components directly onto the board. All Arduino I/O, power (5V, 3.3V, Vin), and ground pins are conveniently broken out to headers for easy access and wiring.
Additional onboard features often include:
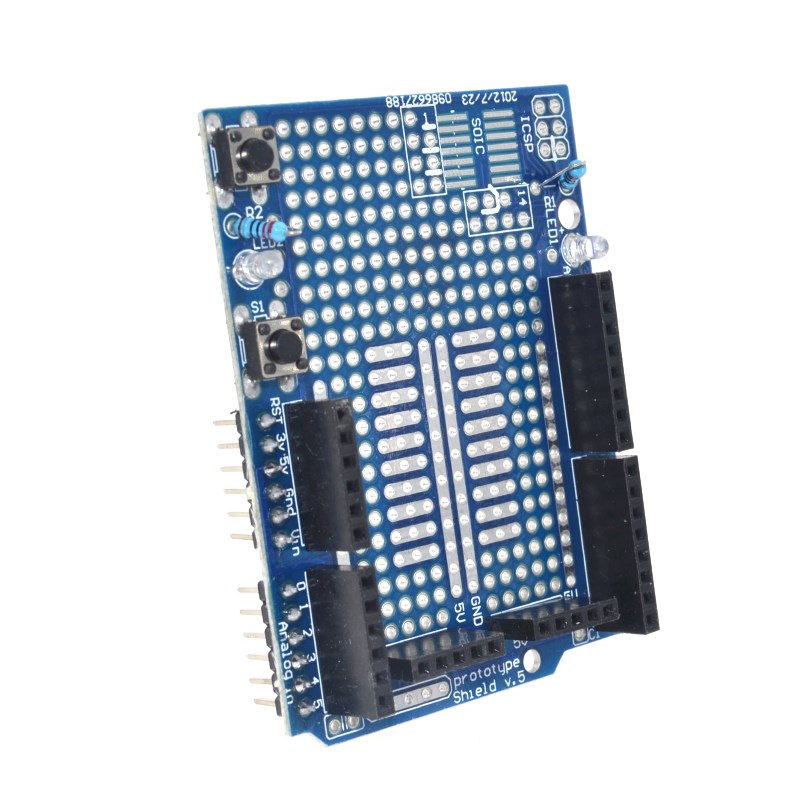
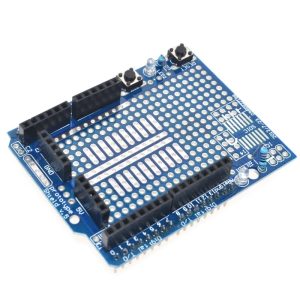
  • A user-accessible reset button that mirrors the Arduino UNO’s button for easy programming and restart cycles.
  • Two general-purpose LED circuits (usually red and green) with current-limiting resistors, ready to be wired to any I/O pin for debugging or simple visual feedback.
  • A general-purpose pushbutton that can be connected to any I/O pin.
This shield is an essential tool for hobbyists, students, and engineers looking to design, test, and refine custom electronic circuits efficiently with the Arduino platform.
Key Features
  • Compatibility: Specifically designed to fit the pin layout of the Arduino UNO R3 and Duemilanove boards.
  • Prototyping Options: Features a large prototyping area with standard 0.1″ spacing through-holes for soldering components permanently. It also includes an area to attach the provided 170-tie-point mini breadboard for temporary, solderless circuit building.
  • Extended Connections: All Arduino pins, including power (5V, 3V, Vin) and ground lines, are brought out to easily accessible headers for convenient wiring.
  • Onboard Components: Many versions include a pre-wired reset button and two LED circuits (often red and green) with matching resistors, ready for immediate use.
  • SMD Area: A dedicated soldering position for Surface Mount Device (SMD) chips, supporting up to 14 or 24-pin SOIC ICs, is included for advanced users.
  • Ease of Use: The shield is engineered for simplicity, making it accessible for beginners while providing enough flexibility for complex projects. 
The ProtoShield is incredibly versatile and can be used in several ways:
For Prototyping (Solderless):
  1. Stack the ProtoShield onto your Arduino UNO R3 board.
  2. Attach the mini breadboard to the designated silkscreen area using its self-adhesive backing.
  3. Build your circuit on the mini breadboard using standard jumper wires and components.
  4. Connect the necessary power (5V, 3.3V, GND) and I/O pins from the shield’s headers to your breadboard circuit. This method keeps components reusable and allows for quick iterations.
For Final Projects (Soldered):
  1. Design and test your circuit first on a separate breadboard or the mini breadboard.
  2. Transfer the components to the main prototyping area of the ProtoShield.
  3. Solder components and bridge connections using solder jumpers on the bottom of the board or solid-gauge wires to create a permanent, durable circuit.
  4. Wire the onboard LEDs and button to specific Arduino I/O pins as needed for a compact, single-module final project.
Q: Is the mini breadboard included with the ProtoShield?

Yes, most third-party ProtoShields designed for the UNO R3 include a detachable 170-point mini breadboard.

Q: Do I need soldering experience to use this product?

Not necessarily. You can use the included mini breadboard for solderless prototyping right away. However, if you plan to make permanent circuits using the main PCB area, basic soldering experience is recommended.

Q: Can I stack other shields on top of the ProtoShield?

Yes, the ProtoShield comes with long pass-through headers, allowing you to stack other Arduino shields on top of it. The ICSP pins are also broken out for this purpose.

Q: How do the pre-installed LEDs and buttons work?

On many versions of the board, the LEDs and general-purpose button are not pre-connected to a specific Arduino pin. You will need to use a short jumper wire to connect them from their dedicated header pins (e.g., L1, L2, SW2) to any digital I/O pin you choose to use in your code.

Q: Can I use this shield with an Arduino Mega or Nano?

This specific shield is designed for the standard UNO/Duemilanove footprint. While it may fit mechanically on some boards like the Mega, dedicated ProtoShields exist that break out all the specific pins for those larger boards. It is not physically compatible with the smaller Arduino Nano.