Product Overview
The 12V Single-Channel Wireless Receiver Board is a ready-to-use wireless control solution designed for seamless integration into 12V DC systems. This module serves as a bridge between a wireless remote and a DC-powered device, allowing you to control motors, pumps, LED lighting, access control systems, and other 12V equipment without complex wiring or programming .
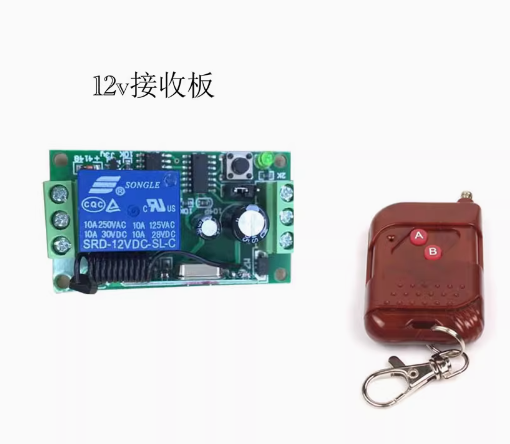
The system includes a compact receiver board designed for DC 12V operation, paired with a stylish walnut-finished remote controller. The 433MHz wireless frequency offers excellent penetration through walls and obstacles, providing reliable control for home automation, automotive accessories, and DIY projects . Whether you are retrofitting existing machinery, building automated gates or barriers, or developing custom control systems, this module offers a simple, effective solution.
Key Features
-
DC 12V Power Compatibility: The receiver is designed to operate on 12V DC power, making it ideal for automotive, security, and battery-powered applications .
-
10A Relay Output: Features a built-in relay capable of switching loads up to 10A at 12V DC or 10A at 120V AC, suitable for controlling motors, solenoid valves, LED lighting, and other DC-powered equipment .
-
433MHz Wireless Technology: Operates on the 433.92MHz frequency band, offering better penetration through walls compared to 2.4GHz alternatives, with typical indoor range of 30–50 meters and up to 100 meters in open space .
-
Learning Code Technology: Utilizes EV1527 learning code technology, allowing secure pairing of multiple remotes without specialized programming tools. The receiver can store multiple transmitters .
-
Multiple Control Modes: Supports programmable operating modes including Momentary (Jog), Toggle (Self-Lock), and Latched modes, configurable via the learning button .
-
Stylish Walnut Remote Controller: The transmitter is housed in a sleek, natural walnut wood casing, providing a premium look and feel suitable for home decor.
-
Easy Installation: The receiver board features screw terminals for power, ground, and load connections (NO, NC, COM), making it simple to wire into existing systems .
-
Status Indicator: An onboard LED provides clear visual feedback for power status, relay activation, and learning mode confirmation .
Technical Specifications
Pinout & Interface Guide
The receiver board is clearly labeled for easy wiring:
Power Input Terminals
Load Output Terminals
-
NO (Normally Open): Connect to the positive wire of your load. The relay connects this terminal to COM when activated .
-
COM (Common): Connect to the positive terminal of your DC power supply (or to the load’s power source) .
-
NC (Normally Closed): Connects to COM when relay is inactive; typically not used for standard control applications .
Important Wiring Note: The relay only switches the positive supply line. The negative wire of your load must be connected directly to the power supply ground .
Control Interface
-
Learning Button: Used to pair new remote controllers or clear existing codes .
-
Status LED: Indicates power, relay state, and programming status .
Control Modes Explained
The receiver supports multiple operating modes, configurable via the learning button :
Usage Guide
Wiring Instructions
IMPORTANT: Always disconnect power before wiring.
-
Power Off: Ensure the DC power supply is disconnected.
-
Connect Power: Connect the positive wire from your 12V DC power supply to the VCC terminal, and the negative wire to the GND terminal .
-
Connect Load:
-
Connect the positive wire of your load (motor, light, solenoid) to the COM terminal .
-
Connect the negative wire of your load directly to the power supply ground .
-
Connect the NO terminal to the load’s positive input (for normally open operation).
-
Check Connections: Double-check all connections are secure before applying power.
-
Power On: Apply power to the system. The status LED should illuminate, indicating the receiver is ready .
Pairing the Remote (Learning Mode)
The receiver uses learning code technology to pair with remotes :
-
Select Mode: Determine which operating mode you need (Momentary, Toggle, or Latching).
-
Enter Learning Mode: Press the learning button on the receiver the corresponding number of times for your desired mode:
-
1 press: Momentary mode
-
2 presses: Toggle mode
-
3 presses: Latching mode
-
Transmit Signal: Press the button on the walnut remote controller. The LED indicator will flash.
-
Confirmation: The LED will flash 3 times to confirm successful learning .
Note: The receiver can store multiple remote codes, allowing control from several transmitters .
Deleting All Learned Codes
To reset the receiver and clear all previously paired remotes :
-
Press the learning button on the receiver board eight times.
-
The LED indicator will flash eight times, confirming all paired remote control data has been successfully deleted .
Range Testing
To verify sufficient signal strength at your installation location:
-
Position the remote at the intended operating distance.
-
Press the remote button and observe if the receiver responds reliably.
-
If response is intermittent, consider relocating the receiver or ensuring the antenna area is free from metal obstructions .
Q: What voltage does this receiver require?
The receiver accepts DC 12V power input only . Do not apply AC mains voltage directly to the receiver—this will damage the unit.
Q: What is the maximum load this relay can handle?
The relay is rated for 10A at 12V DC and can also switch 10A at 120V AC . For inductive loads like motors, it is recommended to derate to 5A–8A to account for startup surges.
Q: What is the effective range of the remote?
In open outdoor space, the range can reach up to 100 meters. Indoors, through walls and floors, the effective range is typically 30–50 meters, depending on building materials . Concrete and metal structures significantly reduce range.
Q: Can I use multiple remotes to control the same receiver?
Yes. The receiver can learn codes from multiple different remotes, allowing several users to control the same device
Q: What are the three working modes for?
-
Momentary: Device stays on only while button is pressed (ideal for motors, garage doors)
-
Toggle: Standard on/off control (ideal for lights, general appliances)
-
Latching: Separate buttons for ON and OFF (requires 2-button remote)
Q: The remote stopped working after I changed the battery. What should I do?
The battery removal may reset the remote’s code transmission. You need to re-pair the remote with the receiver by entering learning mode again
Q: The receiver clicks but my device doesn't turn on. What's wrong?
This indicates the relay is activating but the load circuit is not complete. Check:
-
The load’s negative wire is connected directly to power supply ground
-
The load’s positive wire is connected to the COM terminal
-
The NO terminal is connected to the load’s positive input
-
The load itself is functional
Q: How do I set the receiver to Momentary (hold to operate) mode?
Press the learning button once to enter Momentary mode, then press the remote button to confirm . The LED will flash 3 times to indicate successful pairing.
Q: The remote works sometimes but not consistently. What could be wrong?
This is often a signal or power issue. Check:
-
Battery strength in the remote (replace with new 12V 23A battery)
-
Interference from other 433MHz devices nearby
-
Metal obstructions or distance between remote and receiver
-
Power supply stability (ensure voltage does not drop below 10V during operation)
Q: Can I install this receiver outdoors?
The standard receiver board is not weatherproof. For outdoor installations, mount the receiver inside a weatherproof enclosure rated IP65 or higher.
Q: What wire gauge should I use for power connections?
For 12V 10A applications, use 16–18 AWG wire for power connections. For longer wire runs, use thicker wire to minimize voltage drop
Q: Does the receiver get hot during operation?
The receiver may become slightly warm during normal operation, especially under loads near 10A. Ensure it is installed in a well-ventilated area away from flammable materials.
Q: Can I use this to control a 12V solenoid valve or lock?
Yes. The 10A relay is suitable for most 12V solenoid valves and electric locks. Ensure the lock’s current draw does not exceed 10A.
Q: What can I build with this 12V wireless receiver?
Popular applications include:
-
Remote control of 12V motors and actuators
-
Wireless lighting control for 12V LED strips
-
Remote pump control for irrigation or aquariums
-
Access control systems (gates, doors, barriers)
-
Automotive accessories (winches, lighting)
-
Garage door and electric curtain control
Q: Can I use this to replace a broken garage door remote receiver?
Yes, provided your garage door opener operates on 12V DC and the motor current does not exceed 10A. For higher-current openers, use the receiver to control a higher-rated relay or contactor.
Q: Is this system compatible with smart home assistants like Alexa or Google Home?
This is a standalone RF remote system and does not have built-in Wi-Fi or smart home integration. However, you can pair it with a universal 433MHz RF bridge to enable app or voice control