Product Overview
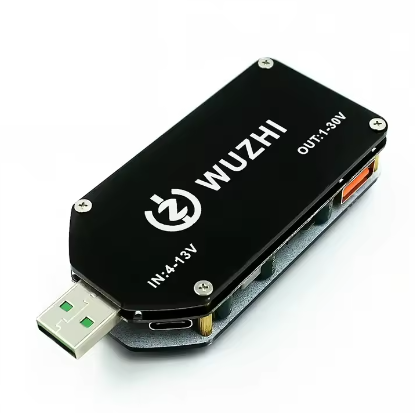
The DP3DT 15W Adjustable USB Power Supply Module is a high-precision, digitally controlled DC-DC converter that combines step-up and step-down capabilities in a compact, ready-to-use package. This versatile power module serves as a programmable constant voltage/constant current (CV/CC) power supply, allowing you to generate a stable output voltage from 1V to 30V using a standard USB power source .
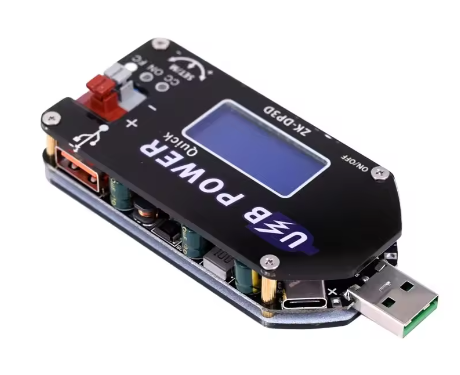
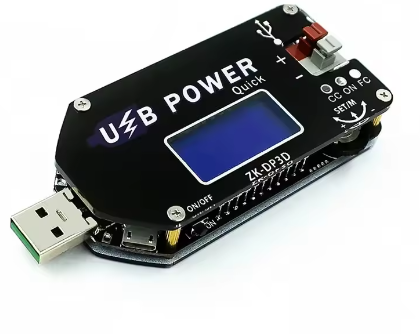
Unlike traditional power supplies, the DP3DT features a digital encoder knob for precise voltage and current adjustment, eliminating the drift and inaccuracy associated with analog potentiometers. The onboard LCD display provides real-time monitoring of input voltage, output voltage, output current, output power, and capacity statistics .
A standout feature of this module is its intelligent fast charge trigger function. By negotiating with QC2.0/3.0, AFC, FCP, or SCP compatible chargers, it can request higher input voltages (9V or 12V), enabling full 15W output power even when powered from a standard USB power bank or phone charger .
Whether you are a hobbyist building a benchtop power supply, a technician needing an adjustable charger for lithium batteries, or an engineer prototyping circuits, the DP3DT provides a precise, portable, and highly functional power solution.
Key Features
-
Digital Encoder Control: Uses a high-resolution digital encoder with push-button selection for precise, drift-free adjustment of voltage and current limit .
-
Wide Input & Output Range: Accepts 4V–13V DC input (via USB-A, MicroUSB, or Type-C) and provides 1V–30V DC output, covering a vast range of applications .
-
15W / 2A Power Capacity: Delivers up to 15W of output power with a maximum output current of 2A, suitable for powering a wide variety of devices and charging batteries .
-
Constant Current (CV/CC) Mode: Features programmable constant current limiting, making it ideal for charging batteries (Li-ion, LiFePO4, Lead-Acid) and driving high-power LEDs without additional circuitry .
-
Intelligent Fast Charge Trigger: Automatically negotiates QC2.0/3.0, AFC, FCP, and SCP fast charge protocols with compatible USB chargers to unlock 9V or 12V input for full power operation .
-
Comprehensive LCD Display: Monitors input voltage, output voltage, output current, output power, and capacity (mAh) in real-time with a resolution of 0.01V and 0.001A .
-
Push-Button Wiring Terminals: Features tool-free, push-button style terminals for fast and secure connection of output wires without needing a screwdriver .
-
Multiple Protection Features: Includes Short Circuit Protection (SCP), Over-Current Protection (OCP), Over-Power Protection (OPP), and Over-Temperature Protection (OTP) to safeguard the module and your devices .
Technical Specifications
Pinout & Interface Guide
The module is designed with a user-friendly interface:
Input Side (Power Source)
-
USB-A Male: Standard USB plug for direct connection to a computer, charger, or power bank.
-
MicroUSB Port: Alternative input for versatile power source options .
-
Type-C Port: Modern USB-C input for easy connectivity .
Output Side (Load Connection)
-
KF301-2P Blue Terminal: Push-button style terminals for connecting your load or device. The two terminals are for VOUT+ and VOUT- .
-
USB-A Female Port: Standard USB port for directly powering USB devices. Warning: Output voltage can be set up to 30V. Ensure your USB device can tolerate this voltage before connecting .
User Controls
-
Digital Encoder (SET/M): Push to cycle through settings (Voltage, Current). Rotate to adjust values. Long-press to access the fast charge protocol menu .
-
Digital Encoder (+/-): Rotate to increase or decrease the selected parameter (Voltage or Current Limit) .
-
ON/OFF Button: Toggles the output on and off .
Display Indicators
-
LCD Screen: Shows Input Voltage (IN), Output Voltage (OUT), Output Current (A), Power (W), and Capacity (mAh) .
-
CC Indicator: A red LED lights up when the module is in Constant Current mode .
-
FC Indicator: A blue LED indicates that a fast-charge protocol has been successfully triggered .
Usage Guide
Quick Start
-
Power the Module: Connect the module to a 5V USB power source (adapter, power bank, or computer).
-
Set Initial Voltage: Press the SET/M button until the voltage display flashes. Rotate the encoder to set a safe starting voltage (e.g., 5V).
-
Enable Output: Press the ON/OFF button to enable power on the output terminals.
-
Adjust Voltage: Rotate the encoder to fine-tune the output voltage to your desired level.
Setting Constant Current (CC) Mode
Constant Current mode is essential for charging batteries or driving LEDs.
-
Enter Current Setting: Press the SET/M button until the current value (A) on the display flashes .
-
Set Current Limit: Rotate the encoder to set your desired maximum current (e.g., 1.0A for a 1000mAh battery).
-
Complete Setup: Press the SET/M button again to save the setting. The display will stop flashing.
When you connect a load, the module will regulate the output to maintain the set current limit if the load tries to draw more, entering CC mode.
Using Fast Charge Trigger
To achieve the module’s full 15W potential, you need a higher input voltage than 5V. Use this feature with a compatible QC or other fast-charge USB charger .
-
Long-Press SET/M: Press and hold the SET/M button for more than 3 seconds to enter the fast charge protocol menu .
-
Select Protocol: Use the +/- encoder to cycle through available protocols: QC2.0, QC3.0, AFC, FCP, SCP, AUTO, or OFF .
-
Trigger Protocol: Short-press the SET/M button. The module will attempt to trigger the selected protocol on your charger.
-
If successful, “OK” will appear on the screen, and the FC LED will light up .
-
If unsuccessful, “Err” will appear. Select a different protocol or use a compatible charger.
-
Save Selection: For auto-trigger on every boot, select the protocol and then long-press SET/M. For single-use, select and short-press SET/M .
Charging a Lithium Battery
-
Determine Battery Parameters: For a single Li-ion cell, the float voltage is 4.2V. Set the charge current to 0.5C (e.g., 1A for a 2000mAh battery).
-
Set CC/CV Parameters: First, set the output voltage to the battery’s float voltage (4.2V) . Then, set the constant current (CC) limit to your desired charge current (e.g., 1.0A) .
-
Connect the Battery: With the output turned OFF, connect the battery to the output terminals (red to +, black to -) .
-
Start Charging: Turn the output ON. The module will charge in CC mode until the battery reaches 4.2V, then switch to CV mode as the current tapers off. The module’s anti-backflow protection prevents the battery from discharging back into the module .
Q: What is the "DP3DT" and how does it differ from the DP3A or ZK-DP2?
The DP3DT is part of a family of digitally adjustable USB power supplies. It typically features a more advanced digital encoder knob for precise control, while the DP3A often uses potentiometers. The ZK-DP2 is a similar earlier model, with the DP3DT generally offering a more refined user interface and push-button wiring terminals
Q: What does "NC" mean in the product title?
“NC” stands for “No Case.” This module is sold as a bare PCB without an enclosure, making it ideal for embedding into your own projects. A version with a case is typically available separately
Q: Can I use this as a general-purpose benchtop power supply?
Yes, absolutely. Its wide output range (1-30V), constant current/constant voltage (CV/CC) mode, and precise digital control make it an excellent choice for a low-cost, portable benchtop power supply for testing circuits, powering prototypes, and more .
Q: What is the advantage of the digital encoder over a potentiometer?
A digital encoder provides precise, digital control over voltage and current settings. Unlike a potentiometer, which can drift over time or with temperature, the encoder’s settings are stable and repeatable. It also allows for quick adjustments with different step sizes (fine/coarse) .
Q: Why can't I get 15W output from a standard 5V USB charger?
Achieving the full 15W output (e.g., 15V at 1A) requires more than 5V input due to conversion losses and current limitations. A standard 5V charger would need to supply over 3A, which is beyond its capability. You must use the Fast Charge Trigger feature with a compatible QC2.0/3.0 or other fast-charge charger to negotiate 9V or 12V input for full power .
Q: The module gets hot at high output power. Is this normal?
At power levels above 10W, the module will generate noticeable heat. The module includes Over-Temperature Protection (OTP) that will shut down the output if it exceeds 100-110°C . For prolonged operation near 15W, it’s recommended to use a small fan for active cooling or derate the power.
Q: How do I know if the Fast Charge trigger is successful?
When you attempt to trigger a protocol, the screen will display “OK” and the blue FC indicator LED will light up if successful. If it fails, it will display “Err” .
Q: The module is not working. The output is 0V.
Follow this checklist:
-
Ensure the ON/OFF button has been pressed to enable the output .
-
Check that the input power source is providing at least 4V and can supply enough current.
-
Check that you haven’t accidentally triggered an over-power (OPP) or over-temperature (OTP) protection. Reduce the load and press the ON/OFF button to reset .
Q: Can I calibrate the voltage and current readings?
Yes. The module includes a calibration mode. To calibrate voltage: long-press the right button when the voltage is displayed. To calibrate current: short-press to switch to current display, then long-press the right button
Q: Is the USB-A output port directly connected to the terminal output?
Yes. The USB-A female port is directly connected in parallel with the screw terminal output. This means any voltage you set will be present on the USB port. Be extremely careful when setting high voltages, as connecting a standard 5V USB device to a 24V output will damage it