XD-203 Multi-Function Shield For Arduino UNO R3

SKU: FA1046
Model

XD-203 (HCARDU0085)

Compatibility

Arduino UNO R3, Leonardo, Mega 2560

Operating Voltage

5V DC (Sourced from Arduino board)

Driver ICs

2 x 74HC595 (for 7-segment display)

Potentiometer

10K Ohm adjustable precision trimpot

Input/Output

4 LEDs, 3 Push Buttons, Piezo Buzzer

Expansion Interfaces

DS18B20, LM35, IR Receiver, Serial Header, Servo Interface

Dimensions

Standard Arduino Shield form factor

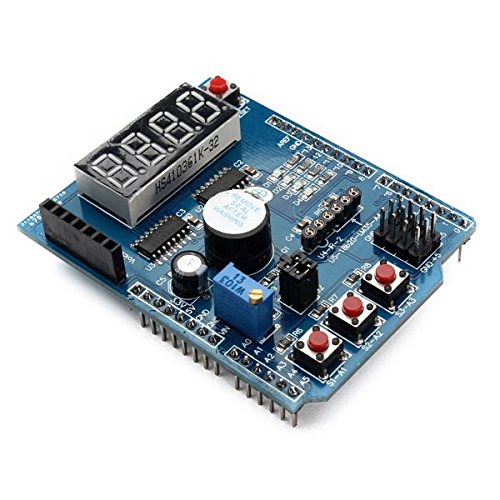
XD-203 Multi-Function Shield for Arduino UNO R3
The XD-203 Multi-Function Shield is an all-in-one expansion board that conveniently stacks onto the Arduino Uno R3, Arduino Leonardo, and Mega 2560 mainboards. It is specifically designed as a learning module and prototyping tool, integrating a suite of common input and output components into a single, compact shield. 
This eliminates the need for complex breadboard wiring and individual components, allowing beginners to immediately start experimenting with fundamental electronics concepts like digital output (LEDs, buzzer), digital input (buttons), analog input (potentiometer), and serial communication (7-segment display). The shield also includes various expansion headers to easily connect external sensors or communication modules, making it a versatile platform for both basic education and general-purpose projects. 

Key Features
  • All-in-One Learning Platform: Integrates multiple components into a single plug-and-play board, ideal for STEM education and rapid prototyping.
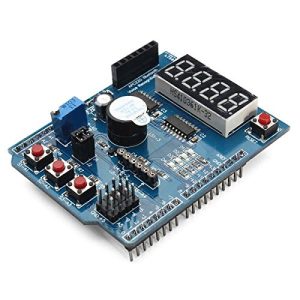
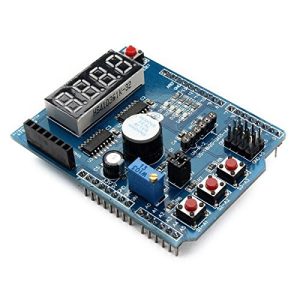
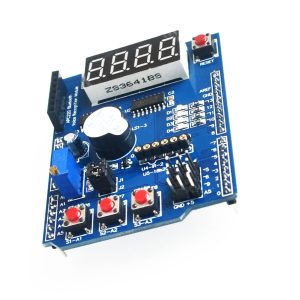
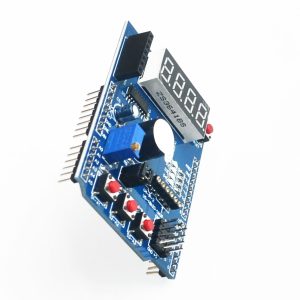
  • 4-Digit 7-Segment LED Display: Driven by two 74HC595 serial shift registers, teaching efficient use of Arduino I/O pins via SPI communication.
  • User Inputs: Includes three independent push buttons and a 10K precision adjustable potentiometer for versatile analog and digital input testing.
  • Visual & Audio Outputs: Features four surface-mount LEDs for visual feedback and a piezo buzzer for adding audio alerts or simple tones.
  • Sensor Interfaces: Provides dedicated 3-pin headers for connecting common external sensors, including the DS18B20 temperature sensor and LM35 temperature sensor.
  • Expansion Ports: Includes interfaces for an infrared (IR) receiver and a serial header for connecting modules like Bluetooth Bee, wireless transceivers (APC220), or voice modules.
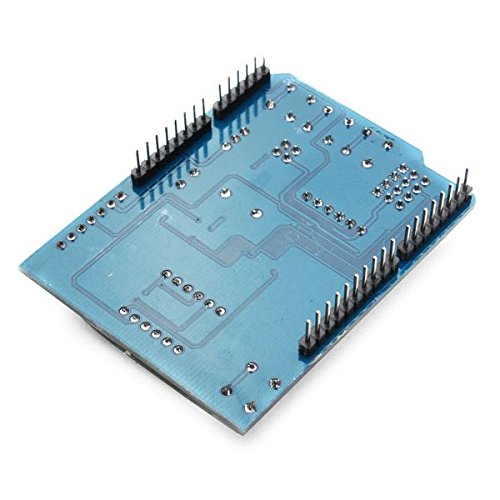
  • Arduino R3 Compatibility: Features the standard R3 header layout for seamless stacking onto most mainstream Arduino controllers. 

Technical Parameters (Specifications)
Parameter  Value/Description
Model XD-203 (HCARDU0085)
Compatibility Arduino UNO R3, Leonardo, Mega 2560
Operating Voltage 5V DC (Sourced from Arduino board)
Driver ICs 2 x 74HC595 (for 7-segment display)
Potentiometer 10K Ohm adjustable precision trimpot
Input/Output 4 LEDs, 3 Push Buttons, Piezo Buzzer
Expansion Interfaces DS18B20, LM35, IR Receiver, Serial Header, Servo Interface
Dimensions Standard Arduino Shield form factor
Usage Instructions
The XD-203 shield is designed for ease of use. You simply stack it onto your Arduino board and upload sample code to begin experimenting. 
Hardware Setup:
  1. Stack the Shield: Carefully align the long header pins of the XD-203 shield with the female sockets on your Arduino UNO R3 (or compatible Mega/Leonardo board).
  2. Ensure Proper Fit: Ensure no pins on the underside of the shield are touching the Arduino’s USB connector or other components to avoid short circuits.
  3. Connect Power: Power your Arduino board via USB or the DC barrel jack. The shield draws its power and uses the logic levels directly from the Arduino board. 
Software & Programming:
You can use standard Arduino code for controlling each component individually, or leverage a dedicated library for simpler control of the 7-segment display and buttons.
  1. Install Library (Recommended): For simplified control of complex components like the 7-segment display, install a compatible library (e.g., the “MultiFunctionShield” library available on GitHub) in your Arduino IDE.
  2. Upload Sketches: Use example sketches from online resources (like Cohesive Computing) to test the LEDs, read button presses, display numbers on the 7-segment display, or use the potentiometer as an analog input. 

Q: Do I need to solder anything to use this shield?

Generally, no. The shield comes pre-assembled with headers and components already soldered in place, making it ready for immediate plug-and-play use with an Arduino board.

Q: Which Arduino pins are used by the components on the shield?
The shield uses several pins, typically including: 
  • Digital Pins: D2, D3, D4, D5, D6, D7, D8 (for LEDs, buttons, buzzer, 7-seg control)
  • Analog Pin: A0 (for the potentiometer)
  • Serial Pins: D0/D1 (for the expansion header)
  • Power/Ground: 5V, 3.3V, GND pins. 
Q: Can I connect other shields on top of this one?

This shield uses nearly all the primary I/O pins, especially if you attach sensors to the expansion headers. Stacking another shield on top is generally difficult and will likely cause pin conflicts.

Q: I am a business owner/educator. Is this suitable for a classroom environment?

Yes, absolutely. It is one of the most cost-effective and useful tools for teaching fundamental electronics and Arduino programming concepts to beginners, as all necessary components are onboard and protected. Bulk discounts are often available from suppliers for educational purchases.