Description
The 5V Humidity Switch Relay Module (Blue) is a complete, self-contained humidity monitoring and control solution that automatically activates or deactivates electrical loads based on environmental humidity levels. Unlike complex sensor systems that require microcontrollers and programming, this module operates as a standalone device — simply apply 5V power, connect your load, adjust the threshold, and the module handles the rest .
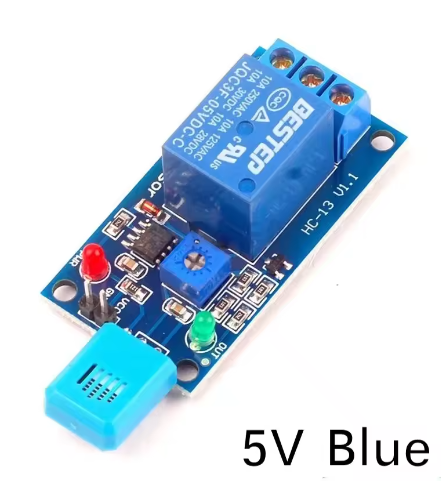
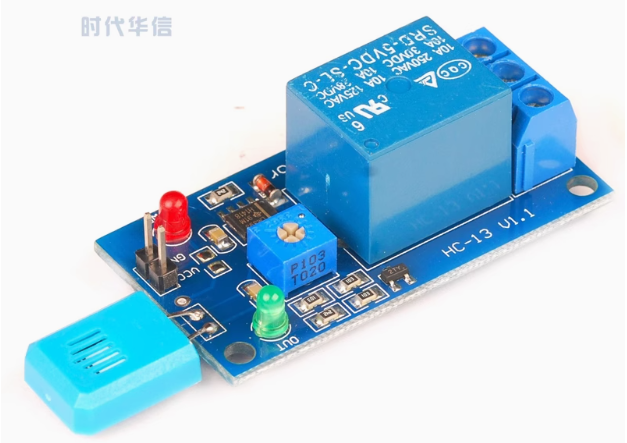
At the heart of the module is the high-quality HR202 humidity sensor (housed in a distinctive blue shell), which detects relative humidity in the surrounding environment . As humidity levels change, the sensor’s electrical properties shift proportionally. An onboard LM393 voltage comparator processes this signal against a reference threshold set by the blue potentiometer, providing clean, stable switching without the jitter or chatter associated with simpler designs .
The module features an SPDT (Single Pole Double Throw) relay with screw terminals for COM (Common), NO (Normally Open), and NC (Normally Closed). The relay contacts are rated for 10A at 250V AC or 30V DC, making it capable of switching most common loads directly — from exhaust fans and dehumidifiers to humidifiers, pumps, and ventilation systems .
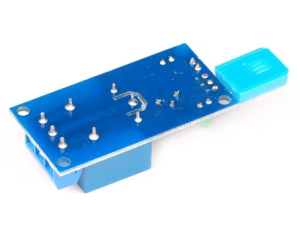
Key features include a red power indicator LED, a green relay status LED, an onboard potentiometer for precise sensitivity adjustment, and four 3mm mounting holes for secure installation . The compact PCB measures approximately 50mm × 26mm, making it easy to integrate into control panels, equipment enclosures, or project boxes .
This module is ideal for greenhouse humidity control, mushroom cultivation rooms, reptile terrariums, bathroom exhaust fan automation, museum and archive environmental control, wine cellars, and any application where maintaining specific humidity levels is critical. It is suitable for both hobbyist projects and commercial installations requiring reliable, maintenance-free humidity switching.
Features
-
HR202 humidity sensor — High-quality, sensitive, and reliable environmental humidity detection
-
5V DC operation — Compatible with USB power supplies, 5V adapters, and Arduino 5V pins
-
10A relay output — SPDT contacts rated for 250V AC or 30V DC loads
-
Adjustable humidity threshold — Onboard blue potentiometer for precise set-point configuration
-
LM393 comparator — Provides clean, stable switching without jitter
-
Dual LED indicators — Red for power, green for relay status
-
Standalone operation — No microcontroller or programming required for basic use
-
SPDT relay contacts — COM, NO, NC terminals for flexible load wiring (normally open or normally closed)
-
Four mounting holes (3mm) — Easy panel or enclosure installation
-
Compact form factor — Approx. 50mm × 26mm × 19mm
Technical Parameters
Usage Guide
1. Module Overview
The board has three main sections:
-
HR202 Humidity Sensor — The blue-shelled component detects environmental relative humidity. It is most sensitive to changes in ambient moisture levels .
-
Comparator Section — Contains the LM393 IC and blue potentiometer for setting the humidity threshold .
-
Relay Section — Contains the 5V relay, screw terminals (COM, NO, NC), and green status LED.
2. Wiring Instructions
3. Understanding Relay Operation
The relay acts as an electrically operated switch:
Typical configurations:
4. Sensitivity Adjustment
The blue potentiometer sets the humidity level threshold at which the relay changes state :
Adjustment tip: Power the module and expose it to the desired humidity condition. Slowly turn the potentiometer until the relay clicks (or the green LED changes state). Due to the relative nature of the adjustment, some trial and error may be required to achieve the exact switching point for your environment .
5. Standalone Operation (No Microcontroller Required)
The module works entirely on its own with just a 5V power supply:
-
Connect 5V and GND to a USB charger, 5V wall adapter, or Arduino 5V pin
-
Connect your load (fan, humidifier, pump, etc.) to the relay terminals (COM and NO or NC)
-
Adjust sensitivity with the potentiometer
-
When ambient humidity crosses the threshold, the relay automatically switches
No programming — truly plug-and-play!
6. Greenhouse Application Example (Exhaust Fan Control)
To automatically turn on an exhaust fan when humidity gets too high in a greenhouse:
5V Power Supply (+) ──→ Module VCC
5V Power Supply (-) ──→ Module GND
AC Live (110V/220V) ──→ COM (Relay)
Exhaust Fan Live ──→ NO (Relay)
Exhaust Fan Neutral ──→ AC Neutral (direct)
Result: When humidity rises above the set threshold, the relay activates and the fan turns on, reducing humidity. When humidity falls below the threshold, the fan turns off.
7. Humidifier Control Application Example (Orchid / Terrarium)
To turn on a misting system or humidifier when humidity drops too low:
5V Power Supply (+) ──→ Module VCC
5V Power Supply (-) ──→ Module GND
12V DC Power (+) ──→ COM (Relay)
Misting Pump (+) ──→ NC (Relay)
Misting Pump (-) ──→ Power Supply GND
Result: When humidity drops below the set threshold, the relay activates (NO closes, NC opens), turning ON the misting pump. When humidity rises above the threshold, the pump turns off .
8. Testing the Module
To verify operation before installation :
-
Connect 5V power to the module (red LED should light)
-
Adjust the potentiometer so the green LED just turns off
-
Breathe gently on the humidity sensor — your breath contains high humidity
-
The green LED should light and the relay should click within a few seconds
-
After a short while, the relay should switch back off as the humidity dissipates
9. Important Notes
-
Power supply: Use a regulated 5V power supply capable of providing at least 150mA. When the relay activates, current draw increases to approximately 70-80mA .
-
Sensor placement: Position the HR202 sensor away from direct airflow (fans, vents) and heat sources for accurate ambient humidity measurement.
-
Response time: The HR202 sensor responds within seconds to humidity changes — faster than many other humidity sensors .
-
Relative adjustment: The potentiometer provides relative adjustment, not an absolute percentage value. Some calibration is expected .
-
DC voltage limitation: For DC loads, we recommend keeping voltages at or below 15V DC for optimal contact performance and longevity .
Q: What is the difference between this module and a DHT11/Arduino-based humidity controller?
This module is a standalone hardware solution — no programming, no microcontroller, no libraries. Simply apply power, set the threshold, and it works. DHT11 + Arduino solutions require coding, wiring, and a separate relay module. This module is ideal for applications where simplicity and reliability are prioritized over data logging or remote monitoring.
Q: Does this module need a microcontroller to work?
No. The module works in standalone mode with just a 5V power supply. The LM393 comparator directly drives the relay based on the humidity sensor input and the potentiometer setting . No programming is required.
Q: What is the HR202 humidity sensor?
The HR202 is a high-quality resistive-type humidity sensor that changes its resistance based on ambient relative humidity. It is known for its sensitivity, reliability, and fast response time. The “blue” version of this module features the HR202 sensor in a distinctive blue epoxy housing
Q: How do I set the humidity threshold?
Adjust the blue potentiometer on the board :
-
Apply 5V power to the module
-
Expose the sensor to the humidity level at which you want switching to occur
-
Slowly turn the potentiometer until the relay clicks (green LED changes state)
-
Fine-tune by moving between drier and more humid conditions
Note: The adjustment is relative, not absolute. You cannot set it to exactly 60% RH by marking the potentiometer — some trial and error is expected
Q: What loads can I control with this module?
The relay contacts are rated for 10A at 250V AC or 30V DC :
For inductive loads (motors, pumps, solenoids), we recommend derating to ≤5A or adding external protection (flyback diode for DC, snubber for AC). For DC loads above 15V, contact life may be reduced .
Q: Why is my module triggering randomly or not triggering at all?
Random triggering:
-
Sensor may be in direct airflow — reposition away from fans or vents
-
Sensitivity may be set too high — turn potentiometer clockwise
-
Electrical noise — ensure stable 5V power supply
No triggering:
-
Check power — measure 5V across VCC and GND (red LED should be lit)
-
Turn potentiometer fully counter-clockwise (maximum sensitivity)
-
Breathe gently on the sensor — relay should activate
-
Check load wiring — if relay clicks but load doesn’t work, verify COM/NO/NC connections
Q: What is the difference between NO and NC connections?
The choice depends on whether you want to remove humidity (use NO) or add humidity (use NC) when the threshold is crossed
Q: Can I use this module outdoors or in wet environments?
The module’s PCB is not waterproof. For outdoor or high-moisture environments:
-
Mount inside a weatherproof enclosure (IP65 or higher)
-
The HR202 sensor can be exposed to ambient air (it needs airflow to measure humidity)
-
Use sealed cable glands for power and load wiring
-
For greenhouse or bathroom use, keep the PCB in a dry location and extend sensor wiring if needed
Q: Can I extend the wiring to the HR202 sensor?
Yes. The HR202 sensor can be extended using twisted-pair wire up to approximately 2-3 meters. For longer distances, use shielded cable to reduce noise pickup. Very long runs may affect accuracy due to increased wire resistance.
Q: What is the operating temperature range of this module?
The module is rated for operation from approximately -40°C to +80°C . The HR202 sensor performs best within 0°C to 60°C. For extreme temperature applications, additional calibration may be required.
Q: What is the typical humidity detection range?
The HR202 sensor is effective across approximately 20% to 85% relative humidity . This covers most environmental control applications including greenhouses, bathrooms, basements, and storage areas.